Fencing is more than just a boundary around our homes. It’s a statement of style, a layer of privacy, and a protective barrier. When thinking about which fence to choose, the options seem endless.
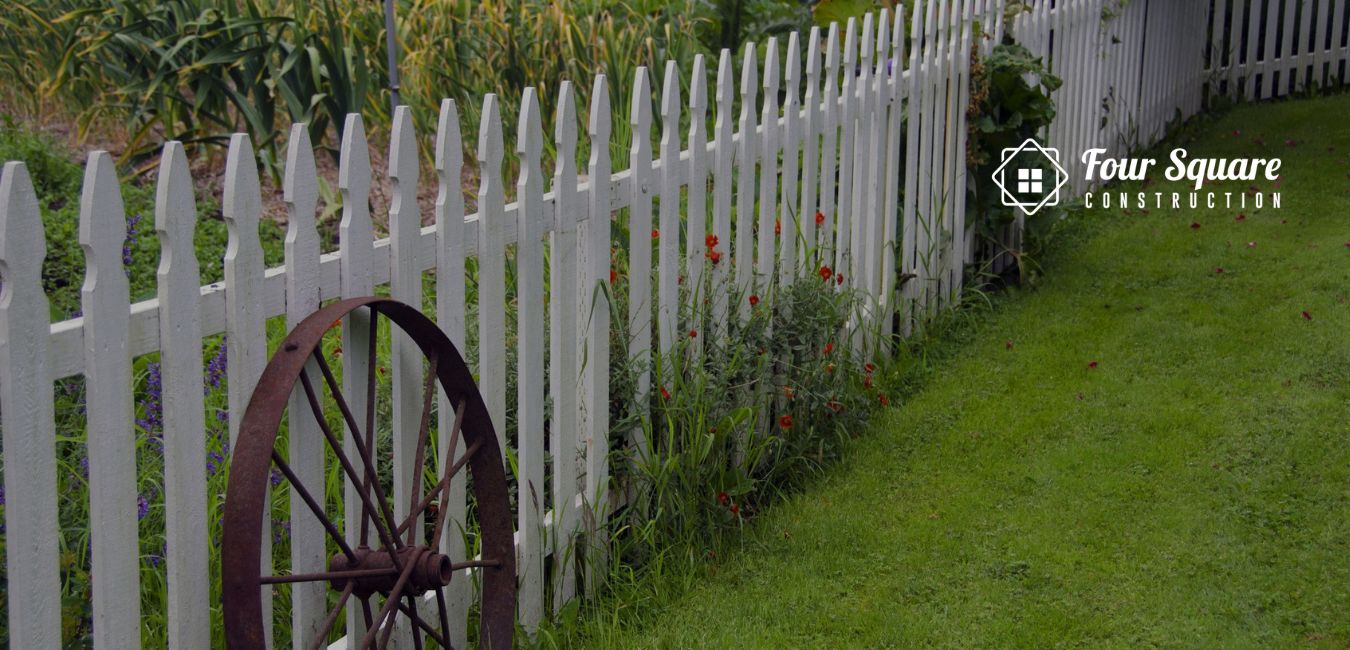
From the white picket dreams of suburbia to the sturdy iron barriers guarding grand estates, there’s a design for every taste and purpose.
So, what are the top types of fences? Dive in, and let’s explore the world of fences together, ensuring that you make the perfect choice for your space.
Split Rail Fence
What Is A Split Rail Fence?
A split rail fence is a traditional fencing style. It is made from logs that are split lengthwise into rails. Laid in a zig-zag pattern, it’s a hallmark of rural settings, combining simplicity with robust design.
Split rail fences are one of the most popular and common among people.
Split Rail Fence With Wire
To enhance security, some split rail fences incorporate wire mesh. This addition makes it harder for animals to pass through. Thus, while retaining its rustic charm, the fence gains added utility and safety.
Split Rail Corner Fence
Every fence has to change direction or end somewhere. For split rail fences, this is achieved using a “corner” design. These corners are crucial for shaping the fence’s path and ensuring it encloses the desired area correctly.
Split rail corner fences are easily accessible and help to maintain the aesthetic of your house.
Wood Split Rail Fence
These fences are predominantly crafted from wood. Among the choices, cedar and pine stand out for their durability and natural aesthetics.
Wood split rail fences not only offer a rustic appearance but are also known for their longevity in outdoor conditions.
Types Of Split Rail Fence
There are primarily 2 main types of split rail fences based on the number of rails.
Depending on your aesthetic preference and functional need, you can opt for fences with two rails or those with three. Each type offers a distinct look and feel, catering to different landscaping visions. There are some other types too but these 2 are the commonly popular types.
Split Rail Dog Fence

For pet owners, the split rail fence can be a godsend. By adding wire mesh, it becomes an effective barrier to keep dogs within the yard. This adaptation of split rail dog fence ensures pets stay safe while homeowners enjoy the traditional fence appearance.
What Size Screws For Fence Rails?
When constructing or repairing a fence, the right screw size matters. Typically, 3-inch screws are recommended for fence rails. These provide stability, ensuring the fence remains strong and durable.
Pressure-Treated Wood For Fence Rails
Considering wood for your fence? It’s wise to go with pressure-treated options. This treatment process makes the wood resistant to pests and decay.
Consequently, your fence stands strong for a longer time, reducing maintenance hassles.
Level Or Follow The Ground?
When installing a fence, one must decide whether it should be perfectly level or follow the ground’s contours.
Wyour ground is uneven, having the fence follow its rise and fall can prevent gaps, offering a tighter, more secure enclosure.
Wood Fence
Wood Farm Fence
Traditionally used in farms, these fences not only delineate boundaries but also keep livestock in. Wood farm fences are usually designed to be sturdy, often combined with wire for added security.
Types Of Wood Fences
There are 5 key wood fence types: picket for decoration, split rail for rustic appeal, privacy for full coverage, lattice for decorative support, and shadow box for airflow with some privacy. Choose based on your needs and style.
Wire And Wood Fence
Combining wire mesh with wood is an effective way to ensure security while retaining the rustic charm of a wooden fence. This hybrid design is especially useful in farms or areas prone to wildlife.
How To Maintain A Wood Fence
Regular inspections for signs of damage, treating the wood to prevent rot, and cleaning off any mold or mildew can help prolong the fence’s life. Keeping vegetation away from the fence also reduces the risk of decay. So, don’t shy away from regularly maintaining your wood fence.
How To Seal A Wood Fence
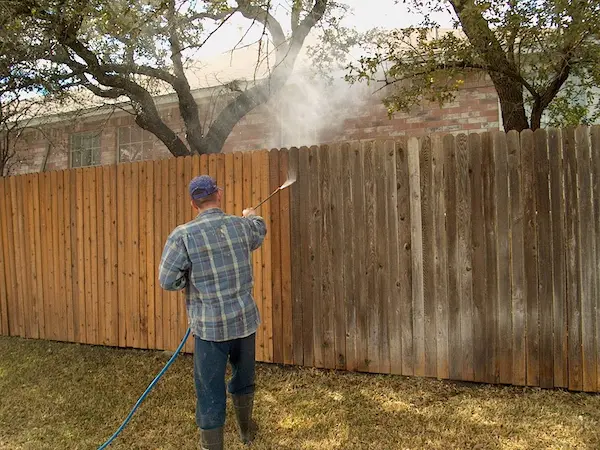
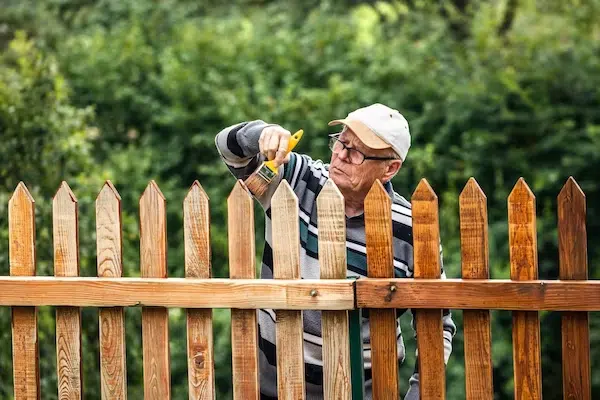
Sealing a wood fence involves applying a protective layer of stain or sealant to shield it from moisture and UV rays. This process typically begins by cleaning the fence, and then applying the sealant with a brush or sprayer.
Sealing your wood fence is almost always a good idea to increase its longevity.
How Long Does A Wood Fence Last
A well-maintained wood fence can last 20 years or more, but its lifespan varies based on the type of wood and the local climate. Cedar, for instance, can last longer than pine if cared for properly.
How To Clean A Wood Fence Without Pressure Washing
For those wary of pressure washing, a fence can be cleaned without pressure washing by using a mixture of warm water, gentle soap, and a soft brush. Scrubbing the fence with this solution can remove dirt and mildew without damaging the wood.
Composite Vs. Wood Fence
In the debate of composite vs. wood fences, wood fences offer natural beauty, and composite fences promise longevity with less maintenance. Composite materials resist rot and pests, but they can be pricier and will not deliver the traditional feel of wood.
Cedar Vs. Redwood Fence
Both cedar and redwood are popular fencing materials due to their natural resistance to decay. Cedar is generally more affordable, while redwood boasts a richer color and slightly better durability.
How To Build A 3 Rail Wood Fence
Building a 3 rail wood fence involves setting posts into the ground at equal intervals, then attaching three horizontal rails between them.
Always ensure the posts are set deep and secured with concrete, and then fix the rails using screws or nails.
Vinyl Fence
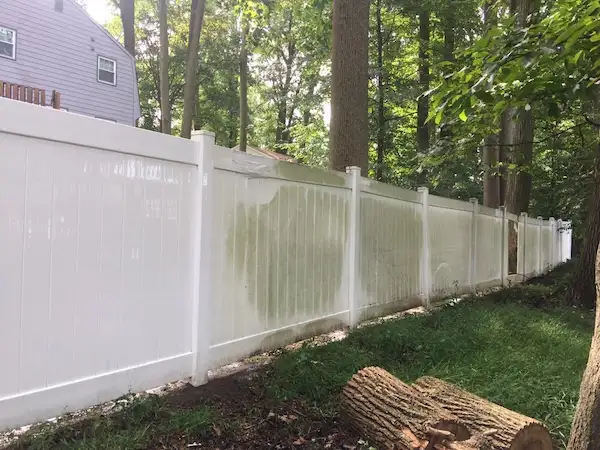
Types Of Vinyl Fencing
Vinyl fencing is a top pick for many yards because it’s strong and looks good. There are different types of vinyl fences you can choose from. Here are some:
Privacy Fences
These are tall and have no gaps between the pieces, so people can’t see into your yard.
Picket Fences
These are shorter and have space between the upright pieces. They’re great for a classic look and keeping pets in the yard.
Shadowbox Fences
These fences look the same from both sides and let some light through. They give a nice look and some privacy, too.
Rail Fences
These have long pieces that go from post to post. They’re often seen on farms or big yards.
Lattice Fences
These have a crisscross design that’s pretty to look at and lets vines grow on them.
Vinyl fences last a long time and don’t need much cleaning to stay looking new. They don’t get eaten by bugs and won’t rot like wood.
You can pick different colors, but white is a common favorite. Vinyl fences are good for any yard, whether you want privacy or just to make your yard look nicer.
Cleaning Black Marks Off A Vinyl Fence
Black marks on a vinyl fence can be an eyesore. Thankfully, these can be cleaned using a mixture of water and a gentle detergent.
For stubborn marks, a magic eraser or a solution of water and white vinegar can be effective. It’s essential to scrub gently to avoid scratching the surface.
Lifespan Of A Vinyl Fence
Vinyl fences are known for their longevity. When maintained properly, vinyl fences can last anywhere from 20 to 30 years. Their resistance to rot, pests, and rust gives them an edge over more traditional materials.
Vinyl Fence Ground Clearance
The general recommendation is to keep a vinyl fence about 2 to 5 inches off the ground. This ground clearance prevents debris accumulation and facilitates easier lawn mowing.
Vinyl Fence Colors
Vinyl fences are available in various colors. While white is the most traditional and popular choice, homeowners can now choose from tan, gray, and even wood-grain patterns.
Some manufacturers also offer color options for vinyl fences like mocha or green, giving homeowners more flexibility in design.
Shadow Box
Shadow Box Fence Vs. Board On Board
Both shadow box and board on board fences offer a semi-private design that lets air flow through while blocking the direct view.
Shadow box fences alternate boards on either side of the railing, creating a “shadow” effect. On the other hand, board on board fences overlap the boards, which offers slightly more privacy.
How To Build A Shadow Box Fence
Building a shadow box fence involves setting posts at equal intervals and then attaching alternating boards on each side of the rails. The boards on one side fill the gaps on the other side, creating the “shadow” effect.
It’s important to ensure the posts are set deep for stability and to use quality boards for longevity.
Making A Shadow Box Fence More Private
To enhance privacy, consider placing boards closer together or adding a layer of mesh or fabric behind the fence. Some homeowners also plant shrubs or vines in front to reduce visibility further making the shadow box fence more private.
Expenses Of Shadow Box Fences
Shadow box fences can be slightly more expensive than basic privacy fences because they require more boards. However, the exact cost depends on the type of wood used, fence height, and regional labor rates.
How Much Does A Shadow Box Fence Cost?
On average, homeowners will spend between $15 to $25 per linear foot on materials for a shadow box fence. Including labor, the total cost of a shadow fence can range from $35 to $50 per linear foot.
Metal Fence
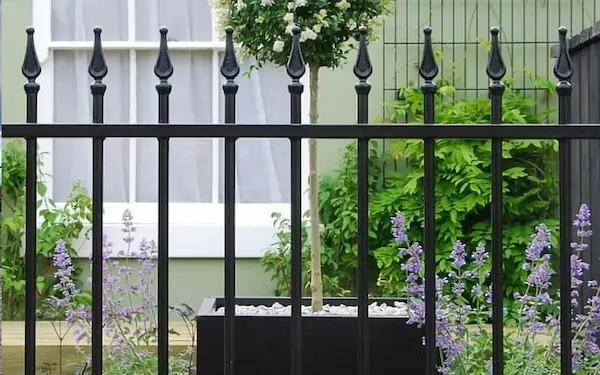
Types Of Metal Fencing
Metal fences are popular for many yards. They are strong and last a long time. People like them because they look good and keep their yards safe.
There are different kinds of metal fences. Each type has its own special look and use.
Chain Link Fences
These fences are made of metal wires woven together. They are great for keeping pets in and strangers out. Chain link fences are not too expensive. They are easy to put up and don’t need much care.
Wrought Iron Fences
These fences are very strong and have beautiful designs. They are perfect for adding style to a yard. Wrought iron fences are good at keeping the yard safe. But, they can be more expensive and need more care to stop rust.
Aluminum Fences
Aluminum fences are light and don’t rust. They are good for places with lots of rain or near the ocean. These fences come in many styles and are easy to take care of.
Steel Fences
Steel fences are the strongest. They are great for places that need extra security. They can last a long time but might be more expensive.
Metal fences are a good choice for any yard. They keep the yard safe, look good, and last long. Each type has its own benefits, so you can pick the one that’s best for your yard
How To Frame Corrugated Metal Fence
You’ll need sturdy wooden or metal posts spaced at regular intervals to frame a corrugated metal fence. Attach horizontal rails between the posts at the top, middle, and bottom.
Then, secure the corrugated metal panels to these rails using screws. It creates a modern, industrial look.
How To Install A Metal Fence
Installing a metal fence involves setting posts into holes filled with concrete, ensuring they are level and spaced evenly.
Once the posts are set, attach the fence panels to the posts using brackets or ties. Always follow manufacturer guidelines for best results when installing a metal fence.
How To Remove Metal Fence Post
First, dig around the post’s base to remove a metal fence post. You’ll need to break or dig out the concrete if it’s set in concrete. Using leverage or a post puller can help in lifting the post out.
How Much Does A Metal Fence Cost?
Metal fences can vary in cost depending on the type (e.g., wrought iron, chain link, aluminum). On average, homeowners will spend between $25 to $75 per linear foot, including installation.
How To Paint A Metal Fence
Clean the fence to remove rust, old paint, and debris Before painting a metal fence. Use a primer suitable for metal surfaces, then apply a metal-grade paint using a brush or sprayer. It’s essential to choose weather-resistant paint for outdoor durability.
How To Build A Wire Fence With Metal Posts
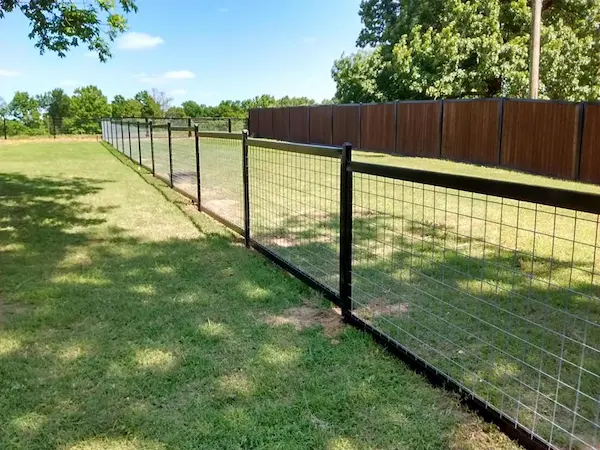
For wire fences, metal T-posts are often used. Space the posts evenly and drive them into the ground when building a wire fence with metal posts. Attach horizontal support (like wood rails or metal wire) and then stretch and secure the wire fencing material.
Ensure the wire is taut for stability.
Is Wire Fencing Scrap Metal?
Yes, wire fencing can be considered scrap metal. Many recycling centers accept old wire fencing, but it’s good to remove any non-metal components like plastic coatings or wood before recycling.
What Paint To Use On Metal Fence
When painting a metal fence, it’s crucial to use a paint designed specifically for metal surfaces. Look for paints labeled as “direct to metal” (DTM) or those formulated for exterior use on metals.
They provide a durable finish that resists rust and weathering.
Are Metal Fence Posts Better Than Wood?
Metal fence posts have some clear advantages over wood posts. Let’s break them down.
Durability
Metal lasts longer than wood. While wood can rot or be damaged by pests, metal stands strong. This means metal fence posts are a better choice if you want something that lasts a long time.
Maintenance
Metal fence posts require less upkeep. Wood needs to be treated or painted to protect it from the elements. Metal just needs occasional cleaning.
Strength
Metal is stronger than wood. It can handle heavy loads and won’t bend easily. This makes metal a solid choice for fences that withstand strong winds or other pressures.
Cost
In the long run, metal is cheaper. Even though wood is less expensive initially, maintaining and replacing it add up. Metal’s long life means you save money over time.
Environment
Metal fence posts are often made of recycled materials. This is good for our planet. Wood, on the other hand, comes from trees. Using a metal can mean fewer trees get cut down.
In short, metal fence posts in comparison of wood, have a lot going for them. They are strong, long-lasting, and better for the environment. Metal is a great choice if you want a fence that will stand the test of time.
Chain Link Fences
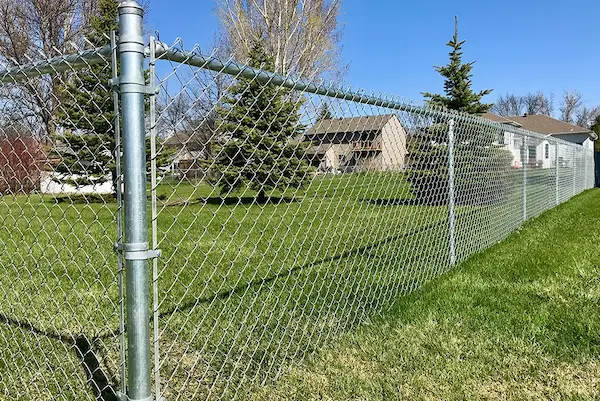
Chain link fences are made from interwoven steel wires. They’re strong, durable, and see-through. Many people choose them for security and to mark property lines. They’re also affordable and need little upkeep.
Over time, they resist pests and rot, unlike wooden fences. You can weave in slats or grow plants around for added privacy. Chain link is a top choice for those on a budget who want a long-lasting fence.
Can You Electrify A Chain Link Fence?
Electrifying a chain link fence is possible, and it keeps unwanted animals or intruders out. Here’s how it works: an electric charge runs through the fence, delivering a short, sharp shock to anything that touches it.
This shock, while uncomfortable, is usually not harmful.
However, consider the following before electrifying a chain link fence:
Legal Concerns
Some areas have strict laws about electrifying fences. It’s crucial to check local regulations and ensure you’re compliant. Non-compliance leads to fines or legal issues.
Safety Protocols
Whenever you’re working with electricity, safety is paramount. Always disconnect power when working on or around the fence. Regular inspections are necessary to ensure the setup remains safe.
Public Awareness
Ensure you have clear signage on and around the fence. This prevents accidental shocks and informs everyone of the electric nature of the barrier.
Maintenance
An electrified fence requires regular checks. Ensure no overgrown vegetation touches the fence, as it can lead to grounding or short-circuits.
Inexpensive Ways To Cover A Chain Link Fence
There are cost-effective solutions to consider if you’re looking to enhance the appearance or cover a chain link fence for more privacy:
Plant Cover
Planting climbing vines like jasmine, ivy, or clematis can transform a chain link fence into a green wall. These plants are beautiful, and offer added privacy as they grow and spread.
Ensure you choose plants suited to your climate for the best results.
Bamboo And Reed Screens
These natural screens are easily attached to a chain link fence at most garden centers using zip ties or wire. They give the fence an organic look while providing significant privacy.
Fabric Panels
Weave through the fence’s links with weather-resistant fabric or tarps. This method is versatile, allowing for various patterns, colors, and designs to match the aesthetics of the surrounding area.
Slats
Slats made of plastic or wood are woven through the chain links. These are uniquely crafted for chain link fences and come in various colors and materials. They provide an immediate facelift and additional privacy.
Both topics offer practical ways to approach chain link fences, enhancing security or aesthetics without breaking the bank.
How To Paint A Chain Link Fence
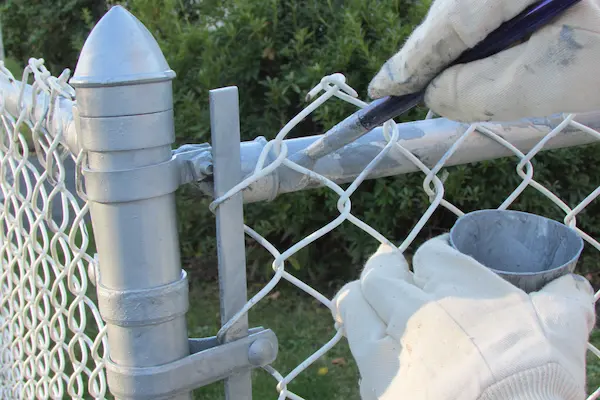
Painting a chain link fence can refresh its look and protect it from rust and deterioration. Here’s a step-by-step guide on how to effectively paint a chain link fence:
Prepare The Area
Remove any plants or obstacles close to the fence. Lay drop cloths or tarps around the base of the fence to catch any drips or overspray.
Clean The Fence
Using a wire brush, scrub away any rust spots. After that, clean the fence with water and mild detergent to remove dirt, grease, and grime. Rinse the fence with a garden hose and let it dry thoroughly.
Choose The Right Paint
Opt for a paint specifically designed for metal surfaces. An acrylic-based metal paint or direct-to-metal (DTM) paint works well for chain link fences. These paints adhere well to metal and offer good protection.
Applying Primer
Consider using a rust-inhibiting metal primer before painting if your fence has many rust spots. This step helps the paint adhere better and prolongs its lifespan.
Painting Technique
Using a paint sprayer is the easiest and most effective method to paint a chain link fence. This ensures even coverage, especially in the nooks and crannies of the chain links.
Push the bristles into the chain link to cover all areas if you use a brush. Remember to paint both sides of the fence.
Second Coat
Assess the coverage after the first coat dries (typically after 24 hours, but check the paint can for specifics). Apply a second coat if the fence still shows through the paint.
Cleanup
Clean your brushes or sprayer immediately after painting. Water and soap will do if you’ve used water-based paint. For oil-based paints, you’ll need a solvent like mineral spirits.
Drying
Let the fence dry completely based on the recommended time on the paint can, but usually, 24 hours should suffice.
Once the fence is fully dry, you can remove the drop cloths, and the fence will have a fresh, renewed appearance!
Always wear protective gear like gloves and safety goggles, and work in a well-ventilated area if you’re using sprayers or strong-smelling paints.
Spray Paint For Chain Link Fence
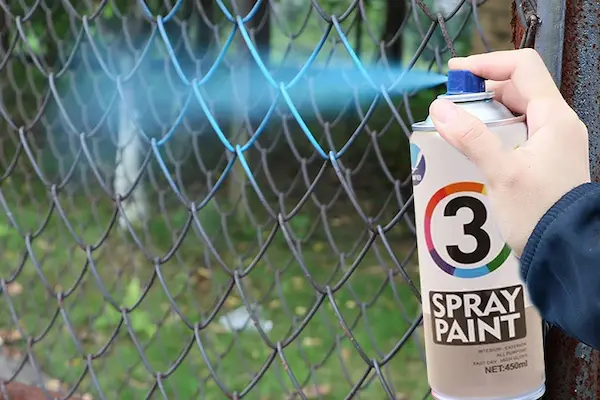
Spray paint is the most effective choice when painting a chain link fence. It provides an even coat and can reach the intricate spaces between the links. Before spraying, clean the fence thoroughly, ensuring no rust or debris is present.
Opt for a spray paint specifically designed for metal surfaces. These spray paints adhere well to the chain link and often have rust-resistant properties.
Mix the spray paint well before starting. While applying, keep the can at a steady gap, typically around 10-12 inches from the fence. Use steady and even strokes to cover the links uniformly.
It’s advisable to wear protective gear, including gloves and a mask, and work in a well-ventilated space to avoid inhaling any fumes. Depending on the paint type, a second coat is necessary for optimal coverage and appearance.
How To Stretch A Chain Link Fence
Setting up a chain link fence requires carefully stretching the fence to avoid sagging. Start by installing the fence posts, ensuring they’re anchored well in concrete and aligned.
Once the posts are in place, roll out the chain link mesh beside the fence line. This gives you an overview of the mesh’s length and where adjustments are needed.
Next, you’ll need to weave a tension bar through the end of the chain link mesh. This bar is essential for pulling and stretching the fence tight.
Attach this bar and the mesh to your starting terminal post using tension bands and bolts, ensuring the bottom of the mesh is slightly above the ground at your preferred height.
Use tools like a fence puller or a come-along to stretch the fence. Attach the puller to the tension bar; as you operate it, the chain link mesh gets stretched. Aim for a consistent tightness across its length.
Once you’ve achieved the desired tension, secure the mesh to the other terminal post using another tension bar and band. Lastly, attach the stretched mesh to the line posts using fence ties to maintain its upright position and tightness.
Chain Link Fence Post Spacing
Chain link fences are a popular choice for many property owners due to their durability and ease of installation. An essential aspect of setting up a chain link fence is the spacing of the fence posts.
Getting the post spacing right is crucial for the fence’s strength and appearance.
Typically, the corner and end posts, known as terminal posts, serve as the starting points for determining spacing. These posts are the main support structures for the chain link fence.
After setting these primary posts, the line posts, which provide support in between, are spaced out.
For most residential chain link fences, the standard spacing for line posts is usually between 8 to 10 feet. An 8-foot spacing is standard, and balances strength and material costs well.
Closer spacing is preferred for added strength if the area experiences strong winds or the fence will support climbing plants.
However, it’s not just about evenly spacing out the posts. The contour of the land also plays a role. Post spacing needs to be adjusted on uneven terrain to accommodate dips or rises in the ground level.
So, while 8 to 10 feet is the general guideline for chain link fence post spacing, factors like the fence’s purpose, the local climate, and the land’s topography can influence the final decision.
Proper spacing ensures the fence remains sturdy and functional for years to come.
Standard Chain Link Fence Height
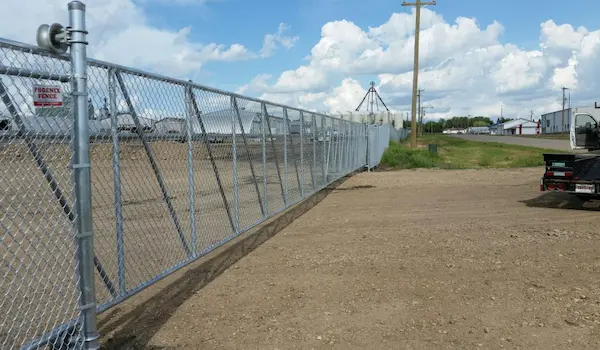
Fences come in many heights, but there are some common sizes that many people pick. The standard heights for chain link fences are 3 feet, 4 feet, 6 feet, and 8 feet.
The 4-foot and 6-foot tall fences are the most popular choices for homes. They’re tall enough to keep pets safe and give some privacy, but not too tall that they block out everything.
The taller 8-foot fences are often used for places that need more security, like businesses. But checking local rules is always a good idea, regardless of height.
Some places have rules about how tall a fence can be, especially near roads or corners.
Chain Link Fence Post Depth
Installing a chain link fence starts with the posts. These posts must be set deep in the ground to ensure the fence is strong and won’t fall over.
Usually, the depth of the hole for the fence post is about one-third the height of the post. So, you’d want to dig a hole about 2 feet deep if you have a 6-foot tall post.
But always check local rules because sometimes they have specific depths you need to follow. Putting some gravel at the bottom of the hole is also a good idea. This helps with drainage and keeps the post strong.
After the gravel, you can pour concrete to hold the post. Once the concrete dries, you can put up the rest of the fence!
Is Chain Link Fence Cheaper Than Wood?
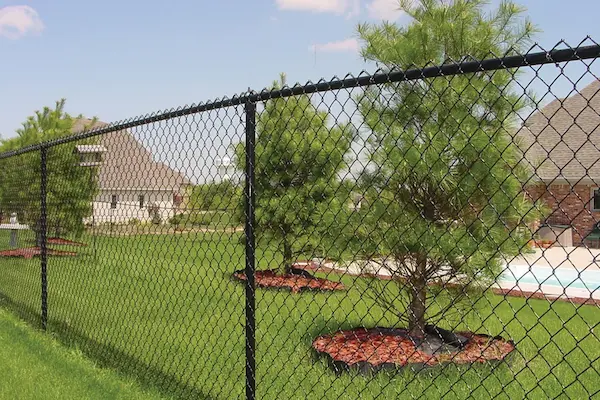
When considering putting up a fence, cost is often a big factor. Between chain link and wood, chain link fences usually cost less. They’re made of metal and come in rolls, making them quicker and easier to install.
On the other hand, wood fences are often made of individual boards and can take more time to set up. The price of wood can also change based on the type of wood you choose.
So, chain link is the way to go if you want a more budget-friendly option. But always think about what you want the fence to look like and how long you want it to last.
Sometimes, spending more upfront can save money in the long run.
Cheaper Alternative To Chain Link Fence
Chain link fences are great, but sometimes they can be a bit pricey. There are some cool choices out there if you’re looking for a more budget-friendly option. One popular choice is the “split rail” fence.
It’s made of wood and looks like a few logs stacked on each other. Another option is a “picket fence.” These are the cute white fences you see in movies. They’re shorter and have pointy tops.
You can also think about “bamboo” or “reed” screens. These are tall panels made of skinny wooden sticks tied together. They’re easy to set up and give a nice, natural look.
Whichever option you choose, make sure it fits what you need and the look you want!
Cedar
How Long Does A Cedar Fence Last
A cedar fence can last a long time. It can stand tall and strong for up to 15 to 30 years if you take good care of it. Cedar is a very tough wood that does not break down easily.
This means it does not rot fast like some other woods. Bugs don’t like cedar, so they stay away from it. This helps the fence last even longer.
Rain, sun, and wind can weaken many fences, but a cedar fence stays strong. It’s because cedar has natural oils.
These oils keep the wood safe from weather and bugs. You can treat your cedar fence with a stain or sealant to help it live a long life. This is like a coat that keeps the fence dry and looking new.
Every few years, check your fence. Look for any parts that are broken or look old. Fix these parts fast to make sure your fence stays in good shape.
When you keep doing this, your cedar fence will be a part of your yard for many years. It will look good and give you privacy and safety.
Fence Maintenance Cedar Vs. Pressure Treated Pine

When you pick a fence for your yard, you want it to look good and last long. Let’s talk about cedar and pressure-treated pine fences.
Cedar Fences
Cedar wood is strong and looks beautiful. It has natural oils that keep bugs away and stop the rot. This means your cedar fence can last long with little work.
Over time, cedar turns a pretty gray color. You can paint or stain it, but you don’t have to. If you like a natural look, cedar is great.
Pressure Treated Pine Fences
Pressure-treated pine lasts long, too. People use chemicals to strengthen this wood against rot, bugs, and weather. These fences are good for places with lots of rain or bugs.
Pressure-treated pine costs less than cedar. You should treat it with a water sealant every year. This helps your pine fence stay strong and look nice longer.
Which One To Choose?
Think about your yard and what you like. Do you want a fence that looks natural and changes color over time? Pick cedar. Do you want a fence that costs less and you don’t mind doing more work on it?
Then pressure-treated pine might be right for you. Both fences are good choices and make your yard look great.
How To Stain A Cedar Fence
Staining a cedar fence is like giving it a new coat of armor. It helps the fence look nice and last long. Here’s how to do it:
First, pick a sunny day to stain your fence. Rain can wash away the stain before it dries.
Next, get your fence ready. Make sure it’s clean and dry. This means you might need to wash it and wait for it to dry before you start.
Now, it’s time to choose your stain. Pick a color you like that also protects the wood. Ask an adult to help you find the best one.
Then, get your tools ready. You will need a brush, a roller, or a sprayer to put the stain on the fence. Wear old clothes because this can get messy!
Start at the top of the fence and move your brush or roller down. Cover every bit of the wood. Don’t leave any spot without stains.
After you put stain on the whole fence, let it dry. This can take a few hours. Don’t touch the fence while it’s drying.
Once the fence is dry, you can play in the yard again. Your fence will look great and be strong for a longer time.
How To Build A Cedar Fence

Building a cedar fence is like making a big puzzle in your yard. First, you need to pick where your fence will go. Mark the ground with spray paint where you’ll dig holes.
Next, dig deep holes for the posts. These posts hold up your fence, so they must go deep into the ground. Make sure the holes are big enough for the posts and some concrete.
Now, mix the concrete. It’s like making a thick, heavy cake mix that will keep your posts strong in the ground. Pour the concrete into the holes with the posts.
Make sure the posts stand tall and straight. Then, wait for the concrete to dry. It’s like waiting for your cake to bake in the oven.
After the concrete sets, it’s time to put up the cedar boards. Cedar smells nice and keeps bugs away. Nail the boards to the posts one by one. Make sure they’re level, which means they don’t tilt but go straight across.
Lastly, take care of your new fence. Cedar is strong, but it likes to stay clean and sometimes needs a coat of sealer to stay looking good.
And there you have it! You made a cedar fence that looks good and will last a long time.
How To Seal A Cedar Fence
To keep your cedar fence looking good and safe from weather, you need to seal it. Here is how you can seal a cedar fence:
First, pick a sunny day to work on your fence. This helps the seal dry fast. Make sure your fence is clean. You can wash it with soap and water and let it dry.
Next, get your tools ready. You will need a brush, roller, or sprayer to put on the sealant. Wear old clothes because this can get messy.
Then, choose a good sealant. Ask someone at the store which one is best for cedar fences. Read the label to see how to use it right.
Now you can start. Dip your brush or roller into the sealant. Cover every part of the fence with a thin layer. Don’t put on too much, or it will drip. Be sure to cover the top and bottom of the fence too.
After you finish, clean your tools with water or another cleaner if the label says to. Let the fence dry for the time the label says. This might be a whole day or more.
Your cedar fence will look shiny and new once it’s sealed. It will last a long time and stand up to rain and sun. Now, you know how to keep your fence strong and pretty!
Can You Paint Cedar Fence

Yes, you can paint a cedar fence! Cedar wood is strong and lasts a long time. People like it for fences because it looks nice and stands up well to the weather.
Before you start painting your cedar fence, you need to prepare it. This means cleaning it well and making sure it’s dry.
First, choose the right paint. For outdoor wood like cedar, use paint that can handle rain, sun, and changes in temperature. When you pick a color, think about how it will look in your yard.
Next, get the fence ready. Clean it to remove dirt and old paint. Then let it dry. This is important because paint sticks better to a clean, dry surface.
Now, start painting. Use a brush or a sprayer for an even coat. Cover all parts of the fence. After the first coat dries, check if you need another one. This makes sure your fence looks great, and the paint lasts longer.
Remember, painting your cedar fence can protect it and make your yard look even better. You can choose a color that matches your home or garden. A painted cedar fence can be a beautiful part of your yard for many years.
How To Clean Cedar Fence
Cedar fences look great and last long. But they need cleaning to stay nice. Here is how you can clean your cedar fence easily.
First, you need some things. Get a bucket, water, mild soap, and a soft brush. Wear gloves to keep your hands clean.
Now, mix water and soap in the bucket. Dip your brush in this soapy water. Then, gently scrub the fence. Start from the top and move down. This way, you clean the whole fence.
Rinse the fence with a hose. Make sure all the soap goes away. If you see more dirt, clean again with the brush.
Do this cleaning once a year. It keeps your cedar fence looking good and lasting long.
Remember, don’t use strong cleaners. They can harm the wood. Mild soap and water work best for cedar fences. Happy cleaning!
Is Cedar Good For Fencing
Yes, cedar is a great choice for fencing. It is strong and lasts a long time. Cedar wood looks good too. It has a nice color and a pleasant smell. This makes cedar fences very popular.
Cedar wood is good against rot and insects. This means it does not break down easily outdoors. It can stand up to rain, sun, and bugs. You don’t have to worry much about it getting damaged.
Another good thing about cedar is that it does not need much care. You don’t have to paint or treat it often. This saves time and money. Cedar fences keep looking good for years with little work.
Cedar is also safe for the environment. It is a natural wood that does not harm the earth. Choosing cedar is a good way to take care of nature.
So, cedar is a top choice for fences. It is strong, looks nice, and is easy to take care of. If you want a fence that lasts and looks great, think about cedar.
Top Types Of Fences: Conclusion
Choosing the right fence can transform your space, offering the right blend of style, security, and functionality.
From wooden panels that bring a rustic charm to sleek metal designs that shout modernity, the top types of fences cater to diverse needs and aesthetics.
As you wrap up your fence quest, remember it’s not just about marking boundaries. It’s about choosing a statement that complements your home, offers protection, and stands as a testament to your style.
So, whether it’s for privacy, beauty, or security, always go for the fence that feels right for you.